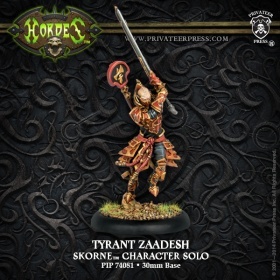
Tyrant Zaadesh

From Warmachine University Archive
Revision as of 17:52, 26 July 2022 by imported>Warmachine University contributors (Imported from HTTrack HTML mirror)
(diff) ← Older revision | Latest revision (diff) | Newer revision → (diff)
Jump to navigation Jump to search

Mk4 has been announced, and we need to talk about what it means for the future of this website.

Please join the discussion either on the WMU Facebook Group or the Talk:Main Page area of this wiki.

Skorne Logo.jpg Tyrant Zaadesh

Skorne Praetorian Character Solo - (Lesser Warlock)

Few house leaders demonstrate the cunning and ambition that Tyrant Zaadesh does, and only time will tell if he is destined for a fast rise or a tragic fall. His warbeasts respond to his will like regimented soldiers in an army, reacting in lockstep to their master. Together with him his beasts function as a cohesive force, each acting in concert with the others to trample his foes with incredible coordination.

Basic Info

Zaadesh1
Missing Info
Tyrant Zaadesh.jpg
COST {{{cacost}}}
UNIT SIZE {{{casize}}}
FA {{{cafa}}}
Warcaster 0
BASE Small
SPD 6
STR 6
MAT 6
RAT N/A
M.A. N/A
DEF 13
ARM 15
CMD N/A
ESSENCE {{{essence}}}
FOCUS N/A
FURY 4
THRS N/A
HP 5
F. Field N/A
WJP {{{wjp}}}
WBP {{{wbp}}}
IHP {{{ihp}}}
FA C
UNIT SIZE N/A
COST 3
N/A
N/A
N/A
Warcaster 1
COST N/A
N/A
Understanding
the Statblock

Abilities

  • Lesser Warlock - 1) This model is not a warlock but has the following warlock special rules: Battlegroup Commander, Fury Manipulation, Healing, Spellcaster, and Transferring Damage. 2) This model must have at least one warbeast in its battlegroup at the start of the game.
  • Sacrificial Pawn [ Battlegroup Warbeast ] - When this model is directly hit by an enemy ranged attack, you can have one friendly, non-incorporeal Battlegroup warbeast within 3" of it directly hit instead. That model is automatically hit and suffers all damage and effects. The Sacrificial Pawn special rule can only trigger once per attack roll.

Weapons

Spells

COST RNG AOE POW DUR OFF
First Blood

2 10 - 10 - Yes
When an enemy model is damaged by First Blood, immediately after the attack is resolved one warbeast in the spellcaster's battlegroup that is currently in its control range can make a full advance toward the nearest enemy model. A model can advance as a result of First Blood only once per turn.
Tag Team

3 SELF Control - Upkeep No
While in the spellcaster's control range, models in its battlegroup gain +2 on melee attack and melee damage rolls against models within melee range of another model in the spellcaster's battlegroup.

Theme Forces

Recent Changes

No changes since 2021.10

Thoughts on Zaadesh1

Zaadesh1 in a nutshell

Zaadesh is a melee lesser warlock with a really nice battlegroup spell and a very difficult to use Zap. Often he justifies his existence as a battlegroup controller by reducing the burden on you Warlock as he casts an animus for them, he then throws himself into the thick of things in the late game. He's the cheap "no frills" skorne lesser warlock; Makeda of House Balaash is a point more expensive but provides support and weapon master attacks for that point.

Combos & Synergies

Other than Paingiver Beast Handlers the question is what to bring with him, and in particular what works in his tiny control area and how to keep him far enough back to not be sniped. These tend to fit three groups; beasts that somehow extend his control area, ranged beasts, and support warbeasts that don't worry to much about staying back.

Beasts that can somehow operate outside his control area:

  • Archidon also has a long leash and is a heavy(ish).

Ranged and support beasts:

  • Basilisk Krea - to spread its aura to protect your infantry from incoming fire. And then run it in to set up the tag team with Zaadesh being the finisher. Zaadesh himself can also run the aura making him harder to shoot. Finally you can make a boosted paralytic gaze shot from the Krea to enable you to land First Blood.
  • Basilisk Drake - an all round good warbeast that flanks with the Krea or gives Zaadesh Tag Team
  • Titan Gladiator - used to spam Rush and in the late game.
  • The Terrorizer - the new warbeast with Rush and both far cheaper than the Gladiator (so less of a risk) and really able to make use of Tag Team.
  • Titan Cannoneer - brought mostly for the shooting and staying away from the enemy to keep Zaadesh safe.
  • Cyclops Raider - that's back far enough!

Probably the two most popular combinations with him are a single Scarab Pack exploiting Tag Team and Hunting Pack or a drake/krea combination (an enraged, flanking, tag teaming krea is a MAT 8 POW 16 warbeast with an extra dice on damage rolls (!))

Drawbacks & Downsides

  • He's squishy
  • If he dies, it's very hard to get those beasts back.
  • First Flood is a bit of a trap, often needing you to boost both the hit and damage roll to maybe get the effect.
  • Tag Team is the same sort of trap Flank is on the Reptile Hound; Zaadesh can only support a small battle group and Tag Team doesn't help the first model to go in.
  • In Masters of War Makeda of House Balaash is always worth the extra point over Tyrant Zaadesh (unless another Makeda is your main caster so you can't take her); +2" threat range on any of your units can be huge. (In Disciples of Agony it's not so clear cut).

Tricks & Tips

  • First Blood is toward, not directly toward, which allows you to move laterally in order to have a line to support models or get the backstrike bonus.
  • If you can keep him safe, and have the points, Zaadesh makes a great tool for Rush, if you bind him to a Gladiator.

Other

Trivia

Other Skorne models

Skorne Logo.jpg       Skorne Index       (Edit)
Battlegroup & Similar
Warlocks Hexeris1 - Hexeris2 - Jalaam1 - Makeda1 - Makeda2 - Makeda3 - Mordikaar1 - Morghoul1 - Morghoul2 - Morghoul3 - Naaresh1 - Rasheth1 - Xekaar1 - Xerxis1 - Xerxis2 - Zaal1 - Zaal2 - Zaadesh2
Lessers & Attachments Aptimus Marketh (Warlock attachment) - Zaadesh1 (Lesser Warlock) - Makeda0 (Lesser Warlock)
Lesser

Agonizer - Aradus Scarab - Reptile Hounds - The Terrorizer

Light Basilisk Drake - Basilisk Krea - Cyclops Brute - Cyclops Raider - Cyclops Savage - Cyclops Shaman - Razor Worm
Heavy

Aradus Sentinel - Aradus Soldier - Archidon - Chiron - Bronzeback Titan - Despoiler - Molik Karn - Rhinodon - Tiberion - Titan Cannoneer - Titan Gladiator - Titan Sentry

Gargantuans Desert Hydra - Mammoth
Units, Solos, & Battle Engines
Units

Cataphract Arcuarii - Cataphract Cetrati - Cataphract Incindiarii - Immortals - Legends of Halaak - Nihilators - Paingiver Beast Handlers - Paingiver Bloodrunners - Praetorian Ferox - Praetorian Karax - Praetorian Keltarii - Praetorian Swordsmen - Tyrant Commander & Standard Bearer - Venator Catapult Crew - Venator Flayer Cannon Crew - Venator Reivers - Venator Slingers

Solos

Abidan the Keeper - Ancestral Guardian - Aptimus Marketh - Extoller Novitiate - Extoller Soulward - Hakaar the Destroyer - Immortal Vessel - Makeda0 - Mortitheurge Willbreaker - Paingiver Bloodrunner Master Tormentor - Paingiver Task Master - Tyrant Rhadeim - Venator Dakar - Void Spirit - Zaadesh1

Battle Engines Siege Animantarax - Supreme Guardian
Theme Forces
Disciples of Agony - Masters of War - The Exalted - Winds of Death
Minions
Refer to Who Works for Whom and/or Category: Skorne Minion
This index was last updated: 2021.11

Rules Clarifications

RC symbol.png

Rules Clarification:  : Magical Damage      (Edit)
(Click Expand to read)

* The "Damage Type: Magical" is not inherited by "secondary" damage from a weapon. That is, stuff like arcs (Electro Leap) or hazards (Scather). (Infernal Ruling)
  • All spells have "Damage Type: Magical" (refer errata).
    • This is inherited by "immediate" secondary damage (such as Eruption of Spines). (Infernal Ruling)
    • and might be inherited by "lingering" secondary damage (see below).
  • If a spell leaves a template in play that does damage to models that walk around in it, then:
    • if it is not described as a hazard it will do magical damage to models that walk around in it. (Example: Razor Wall)
    • if it is a hazard then it will not do magical damage to models that walk around in it. Instead, it does whatever damage type is specified by the spell description. (Example: Breath of Corruption).
    • (Infernal Ruling)
  • If a weapon/spell includes Magic Damage and another kind of elemental damage it will still damage Incorporeal models. Incorporeal models are not affected by the rule "if an attack does multiple types of damage and a model is immune to at least one it is immune to the entire attack."
    The phrase "immune to non-magical damage" should be interpreted as "immune to damage that doesn't include Damage Type: Magical" (not interpreted as "has immunity to Corrosion and Electricity and Cold and etc.")


RC symbol.png

Rules Clarification : Lesser Warlock and/or Draconic Consort     (Edit)

  • This model has a completely separate battlegroup to your main warlock.
    • Your main warlock cannot force warbeasts under this model's control (and vice versa).
    • Any spells/effects that apply to your main warlock's battlegroup (such as Warpath) do not apply to warbeasts under this model's control (and vice versa).
  • This model is a solo, and is not a warlock
    • It is affected by stuff which specifies "non-warlock models" (such as Seduction).
    • It is not affected by stuff which specifies "warlock" (such as Black Arts).
  • When this solo dies, any warbeasts they are controlling go wild exactly as if it was a warlock. (Infernal Ruling)
    • See this article for the Wild warbeast rules and how to re-tame them.
RC symbol.png

Rules Clarification:  : Sacrificial Pawn and/or Sucker! and/or Grim Salvation     (Edit)
(Click Expand to read)

Differences
  • Sacrificial Pawn is optional.
    Grim Salvation and Sucker are not optional.
  • Grim Salvation only works vs basic attacks, not special attacks, power attacks, chain attacks.
    • Spells are not basic attacks, because they are not "made with a weapon". (Infernal Ruling)
    • CRA and CMA are basic attacks. (Infernal Ruling)
    • If a Special Attack generates an additional attack (such as Multi-Fire), the second attack will be basic and as such can have Grim Salvation used vs it. (Infernal Ruling)
  • Sacrificial Pawn & Sucker! don't work against melee attacks.
  • None of them work vs magic attacks (spells).
    All of them work against Magical Ranged attacks, though.
  • The model the attack is transferred to is always hit, even if they have an ability that makes them automatically get missed (such as Stealth).
    Automatically missing is determined earlier in the timing sequence than when the attack is moved. (Infernal Ruling)

From here down, the terms Sacrificial Pawn, Grim Salvation, and Sucker! are interchangeable

  • Using Sac Pawn moves all damage and effects onto the other model.
  • The new model hit may use any abilities that trigger on being hit/damaged by an enemy attack (such as Vengeance and Shock Field).
  • Sprays and AOEs
    • With reference to the timing chart in Appendix A: placing a spray template down occurs at Step 3. Using Sacrificial Pawn occurs at step 6. Placing an AOE template down occurs at step 7.
      Therefore if you use Sac Pawn vs a spray, the placement of the spray template does not change. If you use Sac Pawn vs an AOE, the placement of the AOE template does change.
    • A model indirectly hit by an AOE attack cannot use Sac Pawn vs it.
    • Since a spray template doesn't move, it may cause the Pawn to be hit twice by the same spray. So you then resolve two damage rolls against it.
    • When/if you shift an AOE template, the original target may be clipped by the edge of the AOE anyway (depending on how far apart the original target and Pawn are).
  • Quick Draw vs Sacrificial Pawn (Edit)
    • If enemy "Model A" shoots you, and then you use Quick Draw against "Model A", but they use Sac Pawn to move your Quick Draw attack to "Model B" then ... Quick Draw has no effect (or rather, it affects "Model B" who isn't currently shooting you so is irrelevant). Point is, "Model A" can continue shooting you.
    • This won't happen with Shield Guard though (outside of a very low-probability scenario) because Shield Guard can only be triggered during an enemy turn.


RC symbol.png

Rules Clarification : Perdition and/or First Blood     (Edit)

  • The move does have to be towards the nearest enemy, but it is not "directly" towards.
RC symbol.png

Rules Clarification : Gang and/or Gang Fighter and/or Tag Team and/or Team Effort     (Edit)

  • You can gain the Gang bonus on free strikes, but generally only the first "Ganger" will get it.
For example, if a target is engaged by two models with Gang, when it leaves the melee range of the first Ganger it suffers a free strike with the Gang bonus. Then it leaves the melee range of the second and suffers a normal free strike.