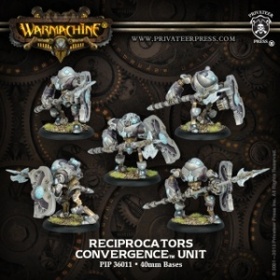
Reciprocators
| Mk4 has been announced, and we need to talk about what it means for the future of this website.
Please join the discussion either on the WMU Facebook Group or the Talk:Main Page area of this wiki. |
| |
Reciprocators |
Ready to repel any threats to the Great Work, reciprocators stand firm, shields interlocking with engineered perfection as they brace to absorb enemy assaults. After blunting a charge against their heavy shields and spears, the reciprocators spring into an immediate counterassault, converting their protean polearms from defensive spears to wicked halberds.
Basic Info
| Reciprocators | |||||||||||||||||||||||||||||||||||
|---|---|---|---|---|---|---|---|---|---|---|---|---|---|---|---|---|---|---|---|---|---|---|---|---|---|---|---|---|---|---|---|---|---|---|---|
 |
|
||||||||||||||||||||||||||||||||||
Abilities
-
 Construct
 -
 Combined Melee Attack
 - Shield Wall (Order) - Until the start of their next activation, each affected model gains +4 ARM while B2B with another affected model in its unit. When receiving this order a model can forfeit its Combat Action to gain +3” movement as part of its Normal Movement this turn. This bonus does not apply to damage originating in the model's back arc. Models in this unit can begin the game affected by Shield Wall.
- Soul Vessel - This model generates soul tokens as if it were a living model.
- Variable [Melee] - At the start of this unit's activation, choose one of the following special rules. The unit's Melee weapons gain the special rule chosen for one round.
- Empowered Attack - This weapon gains +2 on its damage rolls.
- Set Defense - A model in this model's front arc suffers -2 on charge, slam power attack, and impact attack rolls against this model.
Weapons
| Protean Polearm | ||||||||||||||
|---|---|---|---|---|---|---|---|---|---|---|---|---|---|---|
| RNG | POW | P+S | ||||||||||||
| 2 | 4 | 12 | ||||||||||||
Command Attachment
They can have a Transverse Enumerator. Her info has been omitted for brevity.
- Her weapon benefits from Variable.
- In Clockwork Legion, she also gains Vengeance if put with this unit.
Theme Forces
- Clockwork Legions. They gain Vengeance in this theme.
Recent Changes
No changes since 2021.10
Thoughts on Reciprocators
Reciprocators in a nutshell
The Reciprocators' job is to take an enemy charge and then hit back! At ARM 20 in Shield Wall and 8 wounds, this is what they are built for. They are also now quite fast with their shield wall order, moving 8", plus with a caster who improves their speed (Aurora1 or Directrix) or who can boost their armour so much where they can risk running turn one (Lucant).
Previously these were the best heavy infantry in Convergence, but now the other Cyrissian heavy infantry, Eradicators and Perforators, work well together and all three are considered excellent at what they do. The Reciprocator weapons are versatile and right-in-place, well balanced between defense and offence. The selection of which variable weapon to use is often obvious and it depends if you are planning to take or give the charge.
Combos & Synergies
Reciprocators yearn for two things; A speed buff to help them keep up with other units while maintaining shield wall, and a damage buff for when they start poking. Reciprocators are great at two things: getting in front of your army to take an attack, and poking back afterwards. Therefore, they benefit from any buffs that help those two roles (preferably in that order).
- The usual Clockwork Legions synergies.
- Axis1 - Onslaught is a great spell to support Reciprocators when they charge, but then they can't use Shield Wall. His feat covers all the support Reciprocators need. On the other hand, Reciprocators in B2B for Shield Wall will often block Countercharge lanes, though using a Transverse Enumerator fixes this.
- Directrix1's Tactical Supremacy spell is perfect for Reciprocators, letting them move more than running with Shield Wall at 11", and her exponent servitors bring up their P+S into warjack level. Unfortunately while Facilitate increases RAT, she has no way to make them benefit from her feat.
- Lucant1 - an ARM buff on the feat (+4) means the enemy will bounce right off the Shield Wall (another +4), which when paired with Deceleration (and +2 against ranged) can get them up to ARM 26. Positive Charge is great for them too.
- Aurora1 has a great speed buff, but has zero damage buff apart from the costly Arcane Might spell.
- If used with Aurora, Reciprocators become more of a jamming bullet sponge rather than damage dealers.
- Although using all the unit to make a single CMA with Empowered Attack, and then using Arcane Might on that, is powerful. It works out an effective MAT 12 POW 19 + 3d6.
Drawbacks & Downsides
- Charging leaves them open to annihilation. But they're still very capable of jamming for several turns.
- In Shield Wall they have the same ARM (and slightly fewer damage boxes per point) as a Conservator - which has Pathfinder and can run or charge without losing its armor. If you intend to keep them in the heart of the army, the Conservator is probably preferable.
- You will not get the variable effect on your vengeance attack - don’t overestimate your output.
Tricks & Tips
- Like all shield wall infantry, they can forgo their combat action for a speed boost. When paired with Vengeance, they may be moving 11" or more in a turn.
- Capitalise on their durability by:
- pushing them into a zone and staying there far longer than they have any right to,
- deploying them on one side of your army, preventing the enemy flankers from pushing through into the core of your army.
- Keep one model back by an Enigma Foundry, to ensure you always have a Reinforce target.
- Don't forget your CMA. Stack a 2-man CMA with Empowered Attack and you're hitting at effective MAT 9, P+S 16 which is not to be sniffed at.
- Try not to accidentally glue their heads on upside-down (unless you like the look of bowl-cuts).
Other
Trivia
- According to their fluff, they can form perfect shield walls with their interlocking shields, unlike the imperfect ones of the other species. That's amusing when you consider just how hard it is to put them B2B into an actual shield wall-line on the table.
- Released in Forces of Warmachine: Convergence of Cyriss (2013)
Other Convergence models
| | |||||||||||||||||||||||||||||||||||||||||||||||||||||||||||||||||||||||||||||||||||||||||||||||||||
| Battlegroup | |||||||||||||||||||||||||||||||||||||||||||||||||||||||||||||||||||||||||||||||||||||||||||||||||||
| Warcasters |
Aurora1 - Aurora2 - Axis - Directrix - Locke - Lucant - Orion - Syntherion | ||||||||||||||||||||||||||||||||||||||||||||||||||||||||||||||||||||||||||||||||||||||||||||||||||
| Light |
Corollary (Attached) - Diffuser - Galvanizer - Mitigator - Negator - Tesselator | ||||||||||||||||||||||||||||||||||||||||||||||||||||||||||||||||||||||||||||||||||||||||||||||||||
| Heavy |
Assimilator - Cipher - Conservator - Inverter - Modulator - Monitor | ||||||||||||||||||||||||||||||||||||||||||||||||||||||||||||||||||||||||||||||||||||||||||||||||||
| Colossals | |||||||||||||||||||||||||||||||||||||||||||||||||||||||||||||||||||||||||||||||||||||||||||||||||||
| Units, Solos, & Battle Engines | |||||||||||||||||||||||||||||||||||||||||||||||||||||||||||||||||||||||||||||||||||||||||||||||||||
| Units |
Asphyxious4 -
Clockwork Angels -
Eradicators -
Obstructors -
Optifex Directive -
Negation Angels -
Perforators -
Reciprocators -
Reductors | ||||||||||||||||||||||||||||||||||||||||||||||||||||||||||||||||||||||||||||||||||||||||||||||||||
| Solos |
Accretion Servitors - Algorithmic Dispersion Optifex - Attunement Servitors - Destructotron 3000 - Elimination Servitors - Enigma Foundry - Frustum Locus - J.A.I.M.s - Prefect Hypatia - Reflex Servitors - Steelsoul Protector - Widget, Mathlete Archeologist | ||||||||||||||||||||||||||||||||||||||||||||||||||||||||||||||||||||||||||||||||||||||||||||||||||
| Battle Engines | |||||||||||||||||||||||||||||||||||||||||||||||||||||||||||||||||||||||||||||||||||||||||||||||||||
| Theme Forces | Mercenaries | ||||||||||||||||||||||||||||||||||||||||||||||||||||||||||||||||||||||||||||||||||||||||||||||||||
| Clockwork Legions - Destruction Initiative - Strange Bedfellows | |||||||||||||||||||||||||||||||||||||||||||||||||||||||||||||||||||||||||||||||||||||||||||||||||||
| This index was last updated: 2021.11 | |||||||||||||||||||||||||||||||||||||||||||||||||||||||||||||||||||||||||||||||||||||||||||||||||||
Rules Clarifications
Rules Clarification : Construct - None yet. (Edit)

|
Rules Clarification : Combined Melee Attack (Edit)
|
|
|
Rules Clarification : Shield Wall (Edit)
|
|
|
Rules Clarification : Soul Vessel (Edit)
|
|
|
Rules Clarification : Variable (Edit)
|
Rules Clarification : Empowered Attack - None yet. (Edit)
Rules Clarification : Set Defense - None yet. (Edit)