Revision as of 17:52, 26 July 2022 by imported>Warmachine University contributors
(diff) ← Older revision | Latest revision (diff) | Newer revision → (diff)
| Mk4 has been announced, and we need to talk about what it means for the future of this website.
Please join the discussion either on the WMU Facebook Group or the Talk:Main Page area of this wiki.
|
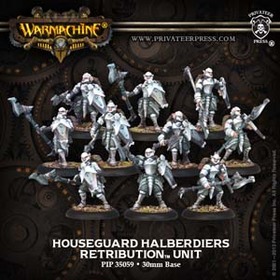
The majority of the houseguard are career soldiers who have spent years at drill and formation. Though they are drawn from dozens of lesser Iosan households, all follow an ancient shared tradition and undergo similar disciplined training and drills. At the orders of their superiors, ranks of halberdiers form a tide of rising and falling steel that can cut down masses of enemies with deliberate ease.
Basic Info
| Houseguard Halberdiers |
| Missing Info |
|
|
| COST |
{{{cacost}}} |
| UNIT SIZE |
{{{casize}}} |
| FA |
{{{cafa}}} |
| Warcaster 0 |
| BASE |
Small |
| SPD |
6 |
| STR |
5 |
| MAT |
6 |
| RAT |
N/A |
| M.A. |
N/A |
| DEF |
13 |
| ARM |
14 |
| CMD |
7 |
| ESSENCE |
{{{essence}}} |
| FOCUS |
N/A |
| FURY |
N/A |
| THRS |
N/A |
| HP |
1 |
| F. Field |
N/A |
|
|
|
|
| WJP |
{{{wjp}}} |
| WBP |
{{{wbp}}} |
| IHP |
{{{ihp}}} |
| FA |
U |
| UNIT SIZE |
6 or 10 +1CA |
| COST |
8 or 14 +4CA |
| N/A |
| N/A |
|
|
|
|
| N/A |
| Warcaster 1 |
| COST |
1.4 pts each |
| N/A |
Understanding
the Statblock |
|
Abilities
- Entire Unit
-
 Combined Melee Attack
- Practiced Maneuvers - Each model in this unit can ignore other models in this unit when determining LOS and can advance through them if it has enough movement to move completely past them.
- Set Defense - A model in this model's front arc suffers -2 on charge, slam power attack, and impact attack rolls against this model.
- Shield Wall (Order) - Until the start of their next activation, each affected model gains +4 ARM while B2B with another affected model in its unit. When receiving this order a model can forfeit its Combat Action to gain +3” movement as part of its Normal Movement this turn. This bonus does not apply to damage originating in the model's back arc. Models in this unit can begin the game affected by Shield Wall.
- Officer only
- The Officer has +1 MAT, CMD, and 5 hitpoints
-
 Officer
- Granted: Reposition [3"] - While this model is in formation, models in its unit gain Reposition [3"]. (Reposition [3"] - At the end of an activation in which it did not run or fail a charge, a model with Reposition [3"] can advance up to 3", then its activation ends.)
- Team Effort [ Minifeat ] - Once per game at any time during its unit's activation, this model can use Team Effort. This activation, models in this unit gain +2 to attack and damage rolls when making a melee attack targeting an enemy model in melee range of another model in this unit.
- Standard
- The Standard does not have CMA or Set Defense
- Standard Bearer - While this model is within 5" of its unit commander, the unit commander gains +2 CMD.
- Take Up - If this model is destroyed, you can choose a Grunt in this unit within 1" of it to be destroyed instead. Effects on this model expire, and it gains the effects on the chosen Grunt. Remove the Grunt from the table instead of this model. This model has the same number of unmarked damage boxes as the chosen Grunt.
Weapons
- Everyone except Standard
- Halberd - 2" reach, P+S 10 melee weapon
- Brutal Charge - This model gains +2 to charge attack damage rolls with this weapon.
- Standard Bearer
- Unarmed - This model has no weapons.
Weapon Attachment
As always, the Halberdiers may be joined by up to 3 Soulless Escorts. Theie weapons/abilities have been omitted for brevity.
Theme Forces
Recent Changes
No changes since 2021.10
Thoughts on Houseguard Halberdiers
Houseguard Halberdiers in a nutshell
Houseguard Halberdiers can be compared to the other, small-based units, like the IFP, the Obstructors or the Karax. They have combined melee attack, plus the role-defining Shield Wall order, which sacrifices mobility for increased resilience.
They lack the hitting power of the IFP, won't survive anti-infantry tech as well as the Karax, and lack the tarpit function the Obstructors can achieve with the enigma Foundry. However, they are surprisingly fast even in Shield Wall. Between Reform from their UA, +2" from the Thane and Advanced Move in theme - they can be up to 24-27" over the board, in Shield Wall and jamming your opponent before they can get hit.
Their offensive power can also be bolstered by Brutal Charge and their minifeat (giving them what is essentially Gang), yielding an effective P+S 14, which is enough to make people hang back. More than that, their natural DEF is the highest among their peers, and grows to absurd levels with Set Defence. This can be especially valuable as enemies usually rely on charges to crack shield walls.
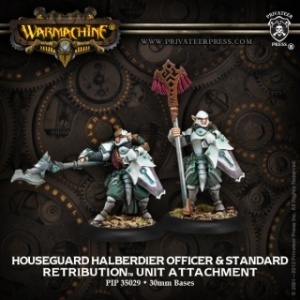
Thoughts on adding the CA
Adding the CA is almost always going to pay dividends. Reposition is essential in their mobility while leaving them in shield wall and the mini-feat gives them one round of decent damage (and they'll probably be dead after that anyway).
Thoughts on adding the WA
The Soulless Escort will rarely defend you against SPD de-buffs - by the time the enemy will be able to drop such spells on you, the Halberdiers already supposed to reach their position. However, against spells which mess with your ARM (like Parasite), or downright forbid you entering into Shield Wall (Rebuke), he can be extremely useful. Like in every case of him, know your enemy before you inflate further this unit's cost.
Combos & Synergies
- Elara2 - her feat, Closing Darkness, along with a Thanes +2" movement allows you to charge through enemy lines, thanks to Ghostly, and strike their warcaster with a 15" threat range.
- Add in Lanyssa. She can be brought into the Defenders of Ios theme, and with Hunters' Mark + Boundless charge you have a very nasty assassination potential from Turn 2, hitting a warcaster/warlock that is only 14" from their board edge if you go second.
- Vyros1 - Inviolable Resolve pushes their ARM up to Khador heavy levels, plus they resist pushes. Their 2" melee range also allows you to trigger the feat's flank bonus from afar.
- Ossyan - Quicken can further protect them against ranged attacks and almost gets them faster to their destination.
- Thyron - feat, with its Side Step, coupled with Reposition 3" means that after the Halberdiers have hit (and they will hit with 3d6 effective MAT 8 attack rolls!), they can delve a further 5" into your opponent's face and be a real pain even though you know they're going to die.
- If you have a single spare point, consider adding the Soulless Escort to these guys. Not only he benefits from the Shield Wall order and the minifeat of the Officer, but his presence makes the delivery of common debuffing spells (Rebuke, Parasite, Crippling Grasp, etc.) all the more difficult/dangerous.
Drawbacks & Downsides
- Like all single-wound shield-walled infantry, they are sweet targets for corrosion templates, snipers, and other attacks that cause a single damage upon hitting.
- Outside themes they compete against Dawnguard units, who - in most scenarios - do the same job better, and are not that much more expensive.
- A lack of Pathfinder outside of a couple spells and one feat and low native ARM means they can be stymied by wall templates of all varieties.
- Though their reach is far, they need to charge to be effective and anything that stops them from charging will make them sad.
Tricks & Tips
- Usual caveat for units in Shield Wall: use the arrow-formation to counter tricks which push unit members out of shield walls.
- Since Shield Wall can be applied from the start of the game, always take advantage of this, which also applies to the Advanced Move benefit from theme.
Other
Trivia
Released in Forces of Warmachine: Retribution of Scyrah (Novermber 2009)
Other Retribution models
Rules Clarifications

|
Rules Clarification : Powerful Charge and/or Brutal Charge (Edit)
- If you declare a charge but move less than 3", then the attack doesn't count as a "Charge Attack" and you won't get the bonus.
|
|
|
Rules Clarification : Unarmed (Edit)
- Since this model has no weapons it does not have a melee range.
- This means it can't engage other models, declare charges, or make free strikes
- Also it can't gain abilities that require a melee range (such as Ragman granting this model Dark Shroud).
- However, other models that do have melee weapons can engage this model. So this model can still gain the "target in melee" shooting bonus.
|
|
|
Rules Clarification : Combined Melee Attack (Edit)
- Each CMA only counts as a single attack, no matter how many participants are involved. This means, for example, that if Satyxis Raiders damage a warjack and trigger their Feedback ability, the enemy warcaster will only take 1 damage total, not 1 for every Raider.
- Any bonuses (such as back strike) or penalties (such as intervening terrain) are determined according to the model leading the CMA (the attack leader).
- If the participants have buffs/debuffs but the attack leader doesn't ... then the CMA doesn't because only the attack leader matters. Simple as that.
- A single unit can perform multiple CMAs, utilising different groupings of models. eg a unit with 10 models could make one 10-man CMA, or two 5-man CMAs, or five 2-man CMAs, or etc.
- CMA for units that have more than one melee weapon (the short version)
- Once you have more than one melee weapon, charging becomes a bit complicated. There are two important rules:
- A model which charges must use its first attack to make a charge attack. It can't "skip ahead" to contributing its second non-charge attack before it's resolved its first attack.
- For a CMA to gain the charging bonus, then all contributors must be contributing a charge attack.
- These two rules have a few, slightly confusing implications. Click the expand box below for a full breakdown.
| CMA for units with more than one weapon (the long version) (Edit)
|
The following example is about Satyxis Raiders, but is equally applicable to other units with two CMA:
- Each Raider gets two attacks. Both, one, or neither can be a CMA as you choose.
- If you are doing two CMA in a row, then you should note that the second CMA doesn’t have to use the same “primary attacker” or the same “participants” as the first CMA.
- For instance, you could have the first CMA with raider A being the "primary attacker" and raider B being the "participant",
- then for the second CMA have raider B the "primary attacker" and raider A the "participant".
- Or leave A alone for a moment and use B plus C. Whatever takes your fancy.
- Primary attackers and participants don't have to use the same weapon. So, continuing with the above example, you could have primary A use lash and participant B use horns, then primary B use lash and participant A use horns. Effectively granting you two lash attacks with CMA bonuses!
- Combined Melee Attack and charging
- Remember the 2 rules above?
- Rule 1 means you cannot contribute your second, non-charge attack before you have resolved/contributed your first attack.
- Rule 1 means you cannot "skip ahead" to resolving your second, non-charge attack before you have resolved/contributed your first attack.
- but wait, there's more!
- However, thanks to the "Units with Combined Melee Attack ignore the rule that one trooper's combat action cannot begin until the previous model's combat action ends" rule, you can "pause" your second attack if you want to do a CMA with it later. For example:
- Model A performs its charge attack.
- Model B performs its charge attack. (Interrupting A)
- Model C performs its charge attack. (Interrupting B)
- CMA using A, B & C's remaining attack.
|
|
Rules Clarification : Practiced Maneuvers - None yet. (Edit)
Rules Clarification : Set Defense - None yet. (Edit)
|
|
Rules Clarification : Shield Wall (Edit)
- You don't need to have the entire unit in B2B to get the bonus. Even just two models in B2B will give it to each other. Which way they're facing doesn't matter, either.
- You can still get Shield Wall while knocked down.
- Shield Wall works against all damage except damage originating in your back arc.
- If a damage roll doesn't have an origin point (such as Scather, Old Witch1's feat, continuous fire, etc) then by definition it can't originate in your back arc, and you'll get your bonus vs it.
- It won't work vs stuff that "leaps" off models in your back arc, such as Electro Leap. (Locked thread)
- If you start the game in Shield Wall, it will expire when you activate the unit. It doesn't let you run and be in Shield Wall on turn 1.
- Since models move in straight lines, it impossible to keep two models B2B while advancing. Thus you cannot benefit from Shield Wall while moving through acid clouds etc.
- Unless you have something that lets you move through models, like Tactician.
- Orders affect unit attachments, even if that attachment doesn't have the order on their card (such as a Soulless Escort benefiting from the Shield Wall order). (Infernal Ruling)
- You get your Shield Wall bonus vs continuous fire in the Maintenance Phase. Shield Wall doesn't expire until the unit activates. (Locked thread)
|
|
|
Rules Clarification : Officer (Edit)
- Even if they're not on the Officer's card, an Officer can give (and benefit from) any non-standard orders that are on the unit's card (such as Shield Wall). Refer main rulebook.
- When the Officer dies, the Leader model becomes the new Unit Commander (you don't get to choose).
- But if your unit doesn't include a Leader model, then you do get to choose any of the remaining models to be the new Unit Commander. You don't swap the model, but it may be worth putting a token down so you can tell that grunt apart.
|
|
|
Rules Clarification : Tactics vs Granted (Edit)
- Granted = The unit loses the ability as soon as the model that grants it is taken off the table. (think "G for Goes away")
- Tactics = The unit keeps the ability for the entire game, regardless of who dies. (think "Tac-Tick = K for Keeps")
-
- Granted [ Vengeance ]
- If the model granting Vengeance dies, the unit will not get any Vengeance attacks.
- It is "If you have Vengeance, and you were damaged last turn, you get a move+attack."
- It is not "If you get damaged, you get Vengeance next turn."
- If you lose Vengeance halfway through resolving Vengeance, then you stop resolving Vengeance immediately. (Infernal Ruling)
|
|
|
Rules Clarification : Reposition (Edit)
- Models out of formation cannot move via Reposition. Refer to the "Out of Formation" rules in the core rulebook.
- End of Activation (Edit)
- You cannot resolve two end-of-activation movement effects (refer to "End of Activation Movement" in the core rulebook). For EOA stuff that doesn't involve movement, though, it gets a bit more murky:
- Some EOA abilities explicitly state your activation ends as part of resolving the ability (like Reposition), and some don't (like Refuge).
- Whether it is explicit it or not, by definition an EOA ability is the last thing you can do for that activation. For instance, if you resolve Refuge and then continue your activation to cast more spells, then you have not used Refuge at the end of your activation.
- You cannot do an "at any time" ability during or after triggering an EOA ability; you cannot cast spells, purchase additional attacks, use a mini-feat, etc.
- If you start resolving an EOA movement (such as Reposition) then you cannot trigger abilities that occur "at any time" (such as Go To Ground). Because you can't trigger it while resolving the EOA movement, and after the EOA movement your activation has ended. (Infernal Ruling)
- For units: if any model in the unit starts resolving the unit's EOA movement, then no model in the unit can trigger an any-time ability. (Infernal Ruling)
- See also the training article: LPG - End of Activation.
|
|
|
Rules Clarification : Gang and/or Gang Fighter and/or Tag Team and/or Team Effort (Edit)
- You can gain the Gang bonus on free strikes, but generally only the first "Ganger" will get it.
- For example, if a target is engaged by two models with Gang, when it leaves the melee range of the first Ganger it suffers a free strike with the Gang bonus. Then it leaves the melee range of the second and suffers a normal free strike.
|
|
|
Rules Clarification : Standard Bearer (Edit)
- If the Officer dies, the Standard Bearer can give the CMD bonus to the Leader model.
|
|
|
Rules Clarification : Take Up (Edit)
- If you use Take Up the attacking model cannot trigger anything that needs the attacker to "Destroy" a model (such as Alpha Hunter, Killing Spree, Berserk, etc). Although the model that was attacked reached the Destroyed step of the timing sequence, Take Up negates that entirely. (Infernal Ruling)
|

|
Note to Editors
To edit the CA's tagged abilities, Click here
|