Liberator
| Mk4 has been announced, and we need to talk about what it means for the future of this website.
Please join the discussion either on the WMU Facebook Group or the Talk:Main Page area of this wiki. |
| |
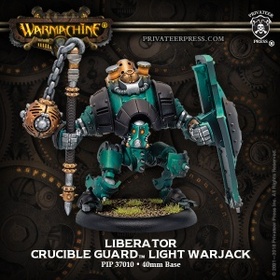
Liberator |
Crucible Arms ’jack mechaniks have taken the reliable Vanguard chassis and subjected it to systematic reconfiguration to produce several variant models, most notable among them the Liberator. To preserve the rare cortex materials required for traditional arc nodes, the Liberator is instead outfitted with an experimental new alchemical powered variant employing a formula of arcanely sensitive compounds. This apparatus is easier and cheaper to produce, allowing the Crucible Guard to deploy the machine in great numbers.
Basic Info
| Liberator | |||||||||||||||||||||||||||||||||
|---|---|---|---|---|---|---|---|---|---|---|---|---|---|---|---|---|---|---|---|---|---|---|---|---|---|---|---|---|---|---|---|---|---|
 |
|
||||||||||||||||||||||||||||||||
Warjack - All warjacks share the same set of special rules. Most notably being big and stompy. Click here for a newbie-friendly recap, or click here for the full rules.
Abilities
-
 Arc Node
 -
 Construct
 - Ashen Veil - This model has concealment. Living enemy models without Immunity: Fire suffer -2 to attack rolls while within 2" of this model.
- Alchemically Treated - When this model suffers a corrosion damage roll and/or fire damage roll, roll one less die. Additionally, this model never suffers the Corrosion continuous effect or the Fire continuous effect.
- Experimental Arc Node - This model's controller can channel spells through it even if it is engaged.
- Node Capacitor - When a spell is channeled through this model, after the spell is resolved roll a d6. On a roll of a 1, this model suffers 1 damage point to its first available Arc Node system box.
Weapons
| Thurible | ||||||||||||||
|---|---|---|---|---|---|---|---|---|---|---|---|---|---|---|
| RNG | POW | P+S | ||||||||||||
| 2 | 4 | 13 | ||||||||||||
| Shield | ||||||||||||||
| RNG | POW | P+S | ||||||||||||
| 0.5 | 2 | 11 | ||||||||||||
Theme Forces
- Crucible Guard
- Magnum Opus
- Prima Materia. This model gains Cutting Edge in this theme.
- Other Factions
- Infernal players can use this model in the Hearts of Darkness theme, but only if Lukas is leading the army.
Recent Changes
NO changes since 2021.04
Thoughts on Liberator
Liberator in a nutshell
The Liberator is a combat light warjack based on the Vanguard chassis that also sports a prototype Arcnode. It has basic combat abilities and has the best defensive statline for a light in the game thanks to its Ashen Veil and Shield rules.
The Experimental Arc Node is more reliable than you may expect the chance of burning it out with 2 spell casts is 1:36 and with the mechanics (and Cutting Edge) the advantage of being able to cast spells while engaged outweigh the potential damage you may suffer.
You should take the Liberator only if you need the arcnode, as for the same price you get the Vanguard, which is more flexible due to having a gun, Shield Guard, Assault and extra POW on its weapon. On the other hand between a shield and Ashen Veil as light warjacks go it is extremely tough, making it effectively a 15/19 against most shooting and almost all living enemies.
Combos & Synergies
- Aurum Legate Lukas di Morray is the obvious Crucible Guard spellslinger, overdosing on drugs to increase his FOCUS. Every Lukas list should start with a Liberator (after Alyce).
- Aurum Lucanum Athanor Locke has the excellent Jackhammer spell but bringing her near the front lines is risky, so a Liberator is a must-have with her.
- Syvestro is a spell-slinger who has plenty of good opportunities to use a melee arc node. Not a "must-have" for him but VERY good, especially for offensive Transmutation and Stygian Abyss.
- The Liberator has more niche use with the other CG casters. Benett for example has multiple 6” range spells she’d like to be able to reapply forward, but she is very mobile.
- Specifically with Bennet, there is a bit of skornergy with the Liberator. Benett really wants to cast spells forward, but she has such good mobility & DEF she can usually just do the same job by herself without needing a Liberator.
Drawbacks & Downsides
- The Liberator is not a cheap light, and can struggle to provide output equivalent to its cost. Both the Retaliator & Vanguard are better value propositions for most lists.
- POW 13 makes it weak into armor so its more of an infantry and cavalry slayer that can help out with Shield Wall/Shield models here and there.
- There’s almost no reason to take a Liberator with Prospero since he only has the one spell that can be channeled. If you’re just buying into the faction, it’s usually better to get two Vanguards first.
- Models that ignore concealment or have fire immunity ignore Ashen Veil, models who circle around its shield or can turn it around with a spell ignore the shield, which results in a big dip in it's survivability.
Tricks & Tips
- Thanks to its quirky arcnode you can still charge in, maul what you can AND still channel that spell you wanted on that unit so badly.
- Provided the Arc Node is not crippled by incoming damage, you only have a 1/9 chance that the node will burn out in two spells (this means an 8/9 chance you get a minimum of three spells, sans repair). For Mackay, Locke, Gearhart, and Syvestro, three spells is often more than enough to justify the presence of a melee arc node. Lukas may want to consider a second Liberator or a Mechanic.
Other
Trivia
Released with the Faction launch (2018.06)
Other Crucible Guard models
| | |||||||||||||||||||||||||||||||||||||||||||||||||||||||||||||||||||||||||||||||||||||||||||||||||||
| Battlegroup & Similar | |||||||||||||||||||||||||||||||||||||||||||||||||||||||||||||||||||||||||||||||||||||||||||||||||||
| Warcasters | |||||||||||||||||||||||||||||||||||||||||||||||||||||||||||||||||||||||||||||||||||||||||||||||||||
| Warcaster attachments | Aurum Legate Alyce Marc (Crucible) - Sylys Wyshnalyrr (Mercenary) - Madelyn Corbeau (Mercenary) | ||||||||||||||||||||||||||||||||||||||||||||||||||||||||||||||||||||||||||||||||||||||||||||||||||
| Other Warjack Controllers | Prospero (BGC) | ||||||||||||||||||||||||||||||||||||||||||||||||||||||||||||||||||||||||||||||||||||||||||||||||||
| Light | Liberator - Retaliator - Vanguard | ||||||||||||||||||||||||||||||||||||||||||||||||||||||||||||||||||||||||||||||||||||||||||||||||||
| Heavy | Suppresor - Toro - Vindicator | ||||||||||||||||||||||||||||||||||||||||||||||||||||||||||||||||||||||||||||||||||||||||||||||||||
| Colossal | Vulcan | ||||||||||||||||||||||||||||||||||||||||||||||||||||||||||||||||||||||||||||||||||||||||||||||||||
| Units, Solos, Battle Engines, & Structures | |||||||||||||||||||||||||||||||||||||||||||||||||||||||||||||||||||||||||||||||||||||||||||||||||||
| Units |
Combat Alchemists -
CG Assault Troopers -
CG Infantry -
CG Rocketmen -
CG Storm Troopers -
Dragon's Breath Rocket -
Failed Experiments
| ||||||||||||||||||||||||||||||||||||||||||||||||||||||||||||||||||||||||||||||||||||||||||||||||||
| Solos |
Ascendant Mentalist - CG Mechanik - Gorman1 - Gorman2 - Hutchuk, Ogrun Bounty Hunter - Prospero - Rocketman Ace - Trancer | ||||||||||||||||||||||||||||||||||||||||||||||||||||||||||||||||||||||||||||||||||||||||||||||||||
| Battle Engines | Railless Interceptor | ||||||||||||||||||||||||||||||||||||||||||||||||||||||||||||||||||||||||||||||||||||||||||||||||||
| Theme Forces | |||||||||||||||||||||||||||||||||||||||||||||||||||||||||||||||||||||||||||||||||||||||||||||||||||
| Magnum Opus - Prima Materia | |||||||||||||||||||||||||||||||||||||||||||||||||||||||||||||||||||||||||||||||||||||||||||||||||||
| Mercenaries | |||||||||||||||||||||||||||||||||||||||||||||||||||||||||||||||||||||||||||||||||||||||||||||||||||
| Refer to Who Works for Whom and/or Category: Crucible Guard Mercenary | |||||||||||||||||||||||||||||||||||||||||||||||||||||||||||||||||||||||||||||||||||||||||||||||||||
| This index was last updated: 2021.05 | |||||||||||||||||||||||||||||||||||||||||||||||||||||||||||||||||||||||||||||||||||||||||||||||||||
Rules Clarifications
Note to self: I need to update this rules section after the rules are finalised - juckto.

|
Rules Clarification : Shield and/or Buckler (Edit)
|
Rules Clarification : Chain Weapon - None yet. (Edit)
|
|
Rules Clarification : Warjack (Edit)
Inert warjacks
|
Rules Clarification : Construct - None yet. (Edit)
|
|
Rules Clarification : Channeler and/or Arc Node (Edit)
Channeling in melee
Channeler - LOS
Caster - Attack roll
Stealth - It affects both LOS and the attack roll
|
|
|
Rules Clarification : Ashen Veil and/or Swarm (Edit)
|
Rules Clarification : Alchemically Treated - None yet. (Edit)
Rules Clarification : Experimental Arc Node - None yet. (Edit)
|
|
Rules Clarification : Node Capacitor (Edit)
|